Tag: Video Production

  • How to Reduce Video File Size for On Demand by IPSTUDIO™

    How to Reduce Video File Size for On Demand by IPSTUDIO™

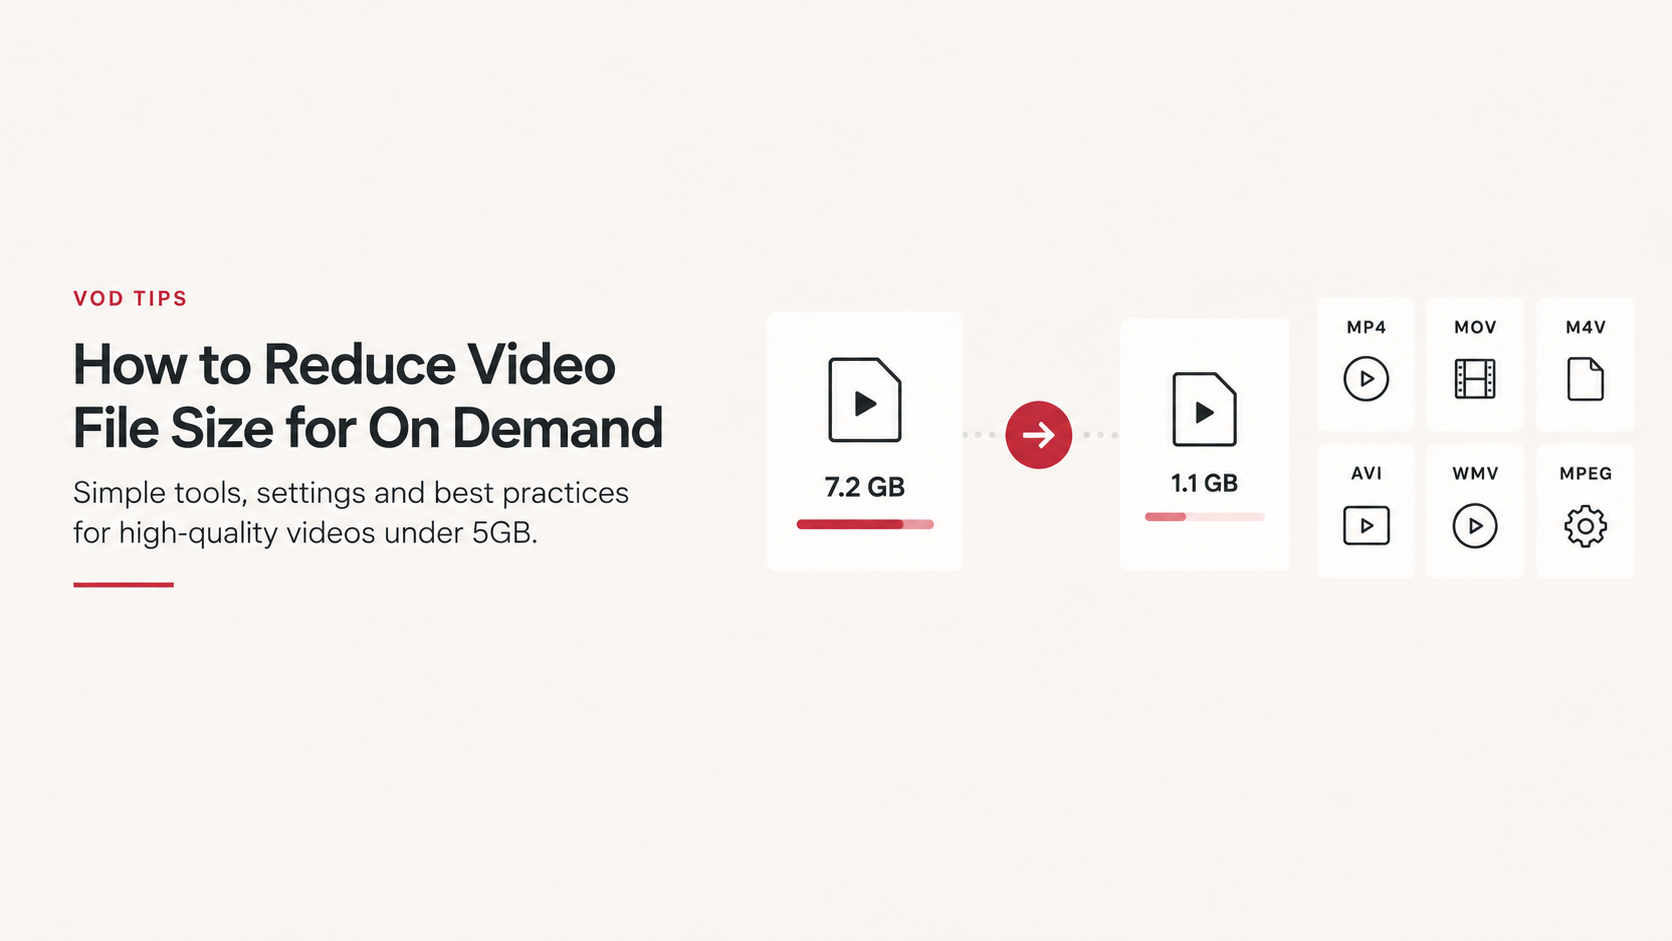
    When uploading videos to On Demand by IPSTUDIO™, each individual video file must be 5GB or smaller.

    If your video exceeds 5GB, don’t worry, you usually don’t need to re-record it. Reducing the resolution, bitrate, or using a more efficient video codec can significantly reduce the file size while maintaining excellent quality for streaming.

    This guide covers our recommended video settings, supported file formats, and several ways to reduce large video files before uploading.

    Recommended Video Settings

    For most fitness and on-demand video content, we recommend recording and exporting at:

    • Resolution: 1080p (1920 × 1080)
    • Frame rate: 30 FPS
    • Video codec: H.264
    • Audio codec: AAC
    • Preferred format: MP4
    • Maximum individual file size: 5GB

    1080p provides excellent quality for streaming without the much larger files created by 4K recording.

    If your camera or phone is currently recording in 4K or 60 FPS, changing the recording settings to 1080p at 30 FPS can substantially reduce the size of future recordings.

    Supported Video Formats

    On Demand by IPSTUDIO™ accepts most major standard video formats, including:

    • MP4
    • MOV / QuickTime
    • M4V
    • AVI
    • WMV
    • MPG / MPEG

    Other standard video formats and codecs may also be accepted. For the most consistent results, however, we recommend uploading an MP4 or MOV file encoded using H.264 video and AAC audio.

    H.264 is particularly well suited to web video because it provides a strong balance between visual quality, file size, compatibility, and processing time.

    Why Is My Video File So Large?

    Video file size is primarily determined by four things:

    Resolution: A 4K video contains approximately four times as many pixels as a 1080p video, which can result in substantially larger files.

    Frame rate: Recording at 60 FPS captures twice as many frames per second as 30 FPS. For most studio classes and fitness content, 30 FPS provides smooth playback without the additional file size of 60 FPS.

    Bitrate: Bitrate determines how much video data is stored for each second of footage. Higher bitrates generally mean higher quality—but also larger files.

    Codec: The codec determines how the video is compressed. Modern codecs such as H.264 and H.265/HEVC can dramatically reduce file size compared with lightly compressed or production-quality formats.

    Professional recording formats such as Apple ProRes can create particularly large files and generally should be converted to a streaming-friendly format before uploading.

    Option 1: Reduce File Size with HandBrake

    HandBrake is a free, open-source video compression tool available for Mac and Windows. It is our recommended option when you need more control over video compression.

    Recommended HandBrake Settings

    1. Open your video in HandBrake.
    2. Select the Fast 1080p30 preset as a starting point.
    3. Set the format to MP4.
    4. Set the resolution to 1920 × 1080.
    5. Select H.264 (x264) as the video encoder.
    6. Use 30 FPS or match the original frame rate if it is already 30 FPS or lower.
    7. Use a constant frame rate.
    8. Keep the audio encoded as AAC.
    9. Choose where you want the new file saved.
    10. Select Start Encode.

    Once processing is complete, check the new file size before uploading it to On Demand by IPSTUDIO™.

    Need an Even Smaller File?

    If the resulting file is still larger than 5GB, you have several options.

    First, increase HandBrake’s RF (Constant Quality) value slightly. A higher RF value creates a smaller file, although increasing it too far will reduce visual quality.

    You can also try H.265/HEVC, which can provide comparable visual quality at a smaller file size than H.264. H.265 generally takes longer to encode, however, and H.264 remains our preferred option when broad compatibility is the priority.

    Another option is reducing the video’s bitrate. For typical 1080p streaming video, you generally do not need the extremely high bitrates generated by cameras or production-quality exports.

    Option 2: Reduce File Size with QuickTime on Mac

    Mac users can also use QuickTime Player for a simple conversion.

    1. Open the video in QuickTime Player.
    2. Select File → Export As → 1080p.
    3. If available, choose either:
      • Greater Compatibility for H.264, or
      • Smaller File Size for HEVC/H.265.
    4. Choose a destination and save the new file.
    5. Check the resulting file size before uploading.

    QuickTime exports video as a .MOV file rather than an MP4, which is fine for upload.

    For most users, exporting a large 4K recording as 1080p is one of the easiest ways to dramatically reduce its size.

    Option 3: Re-Export from Your Video Editor

    If the video was edited in software such as Adobe Premiere Pro, Final Cut Pro, DaVinci Resolve, or iMovie, it is generally better to create a smaller export directly from the original project rather than compressing an already exported video.

    Look for settings similar to:

    Format: MP4
    Codec: H.264
    Resolution: 1920 × 1080
    Frame rate: 30 FPS or source frame rate
    Audio: AAC
    Scan: Progressive

    If your software offers variable bitrate (VBR), it can help allocate more data to complex scenes and less data to simple scenes, improving compression efficiency.

    Should I Upload 4K Video?

    For On Demand by IPSTUDIO™ content, 1080p is recommended.

    Unless you have a specific production requirement for 4K, recording directly in 1080p at 30 FPS simplifies your publishing workflow and helps prevent files from exceeding the 5GB upload limit.

    Tips for Keeping Future Videos Under 5GB

    The easiest way to deal with oversized files is to prevent them from becoming oversized in the first place.

    Before recording your next class:

    • Set your camera or phone to 1080p instead of 4K.
    • Use 30 FPS instead of 60 FPS unless higher frame rates are specifically needed.
    • Avoid recording in ProRes or other professional high-bitrate formats unless you plan to edit and compress the footage afterward.
    • Export finished videos using H.264 for a good balance of quality and file size.
    • Keep audio encoded as AAC.
    • Avoid repeatedly exporting and recompressing the same file, as each lossy re-encode can reduce quality.
    • Keep your original high-quality recording separately if you want to retain a master copy.

    What If My Video Is Still Over 5GB?

    If your finished video remains over the 5GB individual file limit, try the following in order:

    1. Export or convert the video to 1080p.
    2. Convert the video to H.264 MP4.
    3. Reduce the bitrate or increase the HandBrake RF value slightly.
    4. Use H.265/HEVC if additional compression is necessary.
    5. For unusually long recordings, consider dividing the content into multiple videos where appropriate.

    The goal isn’t to create the smallest possible file. It’s to find a good balance between video quality, upload size, processing time, and streaming performance.

    Our Recommended Setup

    For the majority of studios using On Demand by IPSTUDIO™, we recommend keeping things simple:

    Record: 1080p / 30 FPS
    Export: MP4 / H.264 / AAC
    Maximum file size: 5GB per video

    These settings provide high-quality video while keeping files manageable for uploading, processing, and streaming through On Demand by IPSTUDIO™.
  • A Practical Guide for Recording Professional On-Demand Content

    A Practical Guide for Recording Professional On-Demand Content

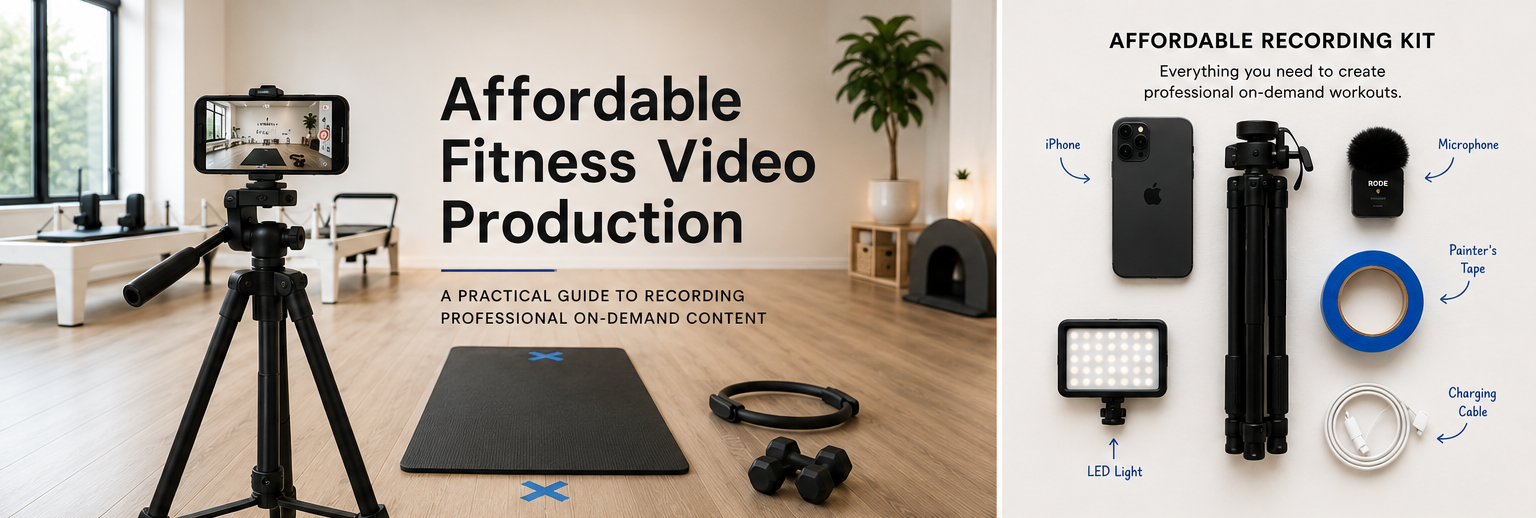
    Launching an on-demand library doesn’t require a production crew, expensive cameras, or a dedicated studio. Many of the most successful boutique fitness brands create engaging content with equipment they already own by focusing on consistency instead of complexity.

    If you’re just getting started, this guide will help you build a repeatable recording process that produces professional-looking classes while keeping costs low.

    Start With the Camera You Already Own

    One of the biggest misconceptions about filming on-demand classes is that you need a DSLR or cinema camera.

    You probably don’t.

    Modern iPhones and flagship Android phones record excellent video that is more than capable of producing a polished member experience.

    A few recommendations:

    • Record in 1080p (Full HD). This provides excellent image quality while keeping file sizes manageable.
    • Use 30 FPS unless you have a specific reason to film at 60 FPS.
    • Clean the camera lens before every recording.
    • Disable notifications or use Airplane Mode so recording isn’t interrupted.
    • Make sure plenty of storage is available before class begins.

    For nearly every boutique fitness studio, 1080p is the sweet spot between quality, upload speed, editing time, and streaming performance.

    Stability Matters More Than Camera Quality

    Nothing makes a video feel amateur faster than a shaky camera.

    Invest in a sturdy tripod and leave it assembled whenever possible.

    Benefits include:

    • Consistent framing
    • Less editing
    • Professional appearance
    • Easier instructor positioning
    • Better continuity between videos

    A simple tripod is one of the highest-value purchases you can make for your recording setup.

    Mark Your Floor

    One of the easiest tricks used by production crews is also one of the cheapest.

    Use painter’s tape or discreet floor markers to identify:

    • Instructor position
    • Camera location
    • Mat placement
    • Equipment placement
    • Lighting locations

    When every recording starts in exactly the same place:

    • Videos look consistent
    • Camera framing stays identical
    • Editing becomes easier
    • Members know what to expect

    Your audience notices consistency—even if they don’t realize why.

    Build a Repeatable Recording System

    The best studios don’t reinvent the process every time they record.

    Instead, create a simple checklist.

    For example:

    Before Recording

    • Set tripod in marked position
    • Clean camera lens
    • Turn on lights
    • Check microphone
    • Enable Airplane Mode
    • Confirm battery level
    • Verify recording settings (1080p)

    During Recording

    • Begin recording before instructor enters
    • Pause briefly before speaking
    • Keep movements inside the frame
    • Smile and maintain energy throughout

    After Recording

    • Review the first minute
    • Rename the file
    • Upload immediately
    • Back up the original footage

    The fewer decisions you make each filming day, the faster you’ll build your content library.

    Keep Your Camera Position Consistent

    Avoid moving the camera around between workouts.

    Instead, establish one “hero” angle that works for your space.

    Try to keep:

    • Camera height consistent
    • Distance from instructor consistent
    • Horizon level
    • Room centered
    • Lighting unchanged

    Members quickly become familiar with your filming style, making the library feel more cohesive.

    Prioritize Great Audio

    Members will tolerate average video much longer than poor audio.

    If your budget allows for one upgrade, make it a microphone.

    Affordable options include:

    • Wireless lavalier microphones
    • Clip-on USB-C or Lightning microphones
    • Shotgun microphones for quiet studios

    Even inexpensive microphones typically produce a noticeable improvement over the phone’s built-in mic.

    Use Natural Light Whenever Possible

    Lighting dramatically affects perceived quality.

    Whenever possible:

    • Face windows instead of having windows behind you.
    • Record during consistent daylight hours.
    • Avoid harsh overhead shadows.
    • Add inexpensive LED panel lights if your room is dim.

    Good lighting often has a bigger impact than upgrading your camera.

    Keep the Background Clean

    Your workout should be the focus—not clutter.

    Before filming:

    • Remove water bottles and bags
    • Hide cleaning supplies
    • Straighten props
    • Check mirrors for unwanted reflections
    • Eliminate distracting signage

    A clean space instantly elevates production value.

    Record Multiple Classes in One Session

    Changing outfits between classes can create the appearance of multiple filming days while maximizing efficiency.

    Batch recording helps you:

    • Build your library faster
    • Reduce setup time
    • Stay consistent
    • Keep instructors in “recording mode”

    Many successful studios film an entire month’s worth of content over one or two dedicated production days.

    Don’t Chase Perfection

    Members are looking for helpful workouts—not Hollywood productions.

    Minor mistakes are usually fine if:

    • Audio is clear
    • Video is stable
    • Instruction is engaging
    • The workout is valuable

    Publishing consistently is far more important than endlessly reshooting content.

    Create Click-Worthy Video Thumbnails

    Your thumbnail is often the first thing members see before deciding to press play.

    A strong thumbnail can significantly improve engagement.

    Recommended Size

    1200 × 628 pixels

    This size works well across websites, social sharing, and most on-demand platforms.

    Thumbnail Best Practices

    Use:

    • A bright, well-lit action shot
    • The instructor clearly visible
    • Plenty of empty space for text
    • Consistent branding
    • High contrast between text and background

    Avoid:

    • Blurry screenshots
    • Tiny text
    • Overcrowded layouts
    • Multiple competing images
    • Dark or underexposed photos

    Include Helpful Information

    Keep text short and easy to scan.

    Examples:

    • Pilates Foundations
    • Upper Body Strength
    • Full Body Flow
    • Beginner Mobility
    • 20 Minute Core
    • Power Yoga

    Including duration or difficulty level can also help members quickly choose the right class.

    Examples:

    • 30 Min • Intermediate
    • 15 Min • Beginner
    • 45 Min • Advanced

    Maintain a Consistent Thumbnail Style

    Every thumbnail should feel like part of the same library.

    Try to standardize:

    • Logo placement
    • Font
    • Text size
    • Color palette
    • Image style
    • Title position

    A consistent design makes your content library feel more polished and easier to browse.

    Focus on Consistency Over Equipment

    Great on-demand libraries aren’t built by buying expensive gear—they’re built through repeatable systems.

    A smartphone, tripod, good lighting, clear audio, and a consistent production process are enough to create a professional content library that members will enjoy returning to.

    Start simple, improve over time, and focus your energy on creating valuable classes rather than chasing perfect production quality. The more streamlined your recording workflow becomes, the easier it is to keep your on-demand library fresh with new content.

  • Free & Affordable Tools for Studios New to Live & On-Demand Content Creation

    Free & Affordable Tools for Studios New to Live & On-Demand Content Creation

    Live streaming and on-demand libraries aren’t a pandemic pivot anymore.

    They’re a retention strategy.

    Today’s members expect flexibility:

    • Traveling but still want their workouts
    • Missed class and want to catch up
    • Prefer hybrid (in-studio + at home)
    • Want bonus content beyond the weekly schedule

    If done correctly, Live + On-Demand becomes:

    • A retention engine
    • A lead generator
    • A premium upsell opportunity
    • A multi-location value booster

    If done poorly, it becomes:

    • Random uploads
    • Clunky external platforms
    • Low engagement
    • High churn

    This guide walks through how to do it right — without overcomplicating it.

    Step 1: Get Clear on the Goal

    Before buying equipment, ask:

    • Are we retaining members?
    • Are we launching a digital-only tier?
    • Are we supporting multi-location access?
    • Are we increasing app engagement?
    • Are we creating premium programs?

    Gear doesn’t drive revenue.

    Strategy does.

    Affordable Equipment That Actually Works

    You do not need to build a movie studio.

    You need reliable tools that deliver clean audio and stable video.

    Webcams (Fast, Reliable, No Complexity)

    If you’re streaming from a laptop, a high-quality webcam is often enough.

    Popular options include:

    • Logitech Brio
    • Logitech StreamCam

    Why studios like them:

    • Plug and play
    • Crisp HD
    • No capture card required
    • Affordable

    For many studios, this is the smartest starting point.

    Dedicated Cameras (Better for On-Demand Libraries)

    If you’re building a structured on-demand library, you may want more control.

    Two strong options:

    • Zoom Q2n-4K Handy Video Recorder
      Budget-friendly, built-in mic, reliable.
    • Sony ZV-E10
      Higher image quality and excellent autofocus for instructors who move around.

    If using HDMI output, you’ll need a simple capture card (HDMI → USB).

    Beginner-Friendly Streaming Cameras

    The Mevo Start is popular for studios that want:

    • App control
    • Auto-tracking
    • Clean livestream setup without heavy tech

    If you want “set it and teach,” this is worth exploring.

    Audio: The Most Overlooked Upgrade

    Poor audio destroys perceived quality — instantly.

    Good audio builds professionalism.

    Options include:

    • Wireless headset mic (best for instruction clarity)
    • Rode Wireless GO II
    • Lavalier mic under shirt

    If you invest in only one upgrade, make it audio.

    Lighting (Don’t Skip This)

    You don’t need a Hollywood setup.

    You need:

    • 1–2 LED panels
    • Light facing the instructor (not behind)
    • Even front lighting

    Even a modest lighting investment dramatically improves quality.

    Budget Option: Use an iPhone

    For export settings, see our 1080p export and file-size guidance. Modern iPhones shoot up to 4K — but for studio content:

    • Shoot 1080p
    • 30fps
    • Good lighting
    • External mic if possible

    For many studios, this is more than sufficient.

    Software: Keep It Simple

    Editing

    • iMovie (Mac)
    • CapCut
    • Adobe Premiere Pro

    Most studios only need:

    • Trim
    • Add intro/outro
    • Adjust audio
    • Export

    Overproducing delays consistency.

    Live Streaming

    • Streamlabs
    • Zoom
    • Native in-app livestream tools (if supported by your booking system)

    Simple, stable, repeatable systems outperform flashy setups that break mid-class. For an automated workflow, explore Zoom livestream automation.

    Monetization: Where Studios Win or Lose

    Here’s the real question:

    How are members accessing this content?

    Strong models we’re seeing in 2026:

    • Included in unlimited membership
    • $29–$59/month digital-only tier
    • Premium “Hybrid+” membership
    • Program-based bundles
    • Challenge-specific content
    • Multi-location access enhancement

    The key is integration.

    If members leave your ecosystem to access video, engagement drops.

    If it lives inside your app or website experience, retention increases.

    What Actually Moves Revenue

    Let’s be direct:

    1. Consistency beats perfection
    2. Clear audio beats 4K resolution
    3. Weekly structured drops beat random uploads
    4. In-app integration beats external hosting
    5. Strategy beats equipment

    Studios that win with On-Demand treat it like programming — not a side project. For a concrete starting plan, see our guide to your first month of on-demand content.

    Think:

    • 6-week reformer progression
    • Beginner foundations series
    • Mobility track
    • Travel workouts
    • Instructor-exclusive content
    • Seasonal challenges

    That’s how LTV increases.

    How IPSTUDIO Supports Studios

    At IPSTUDIO, we don’t just help studios upload videos.

    We help you:

    • Integrate Live + On-Demand directly into your member ecosystem
    • Align with your booking system
    • Optimize UX across web + app
    • Create structured monetization pathways
    • Launch cleanly and professionally

    If you’re ready to turn Live + On-Demand into a real revenue channel — not just a content library — let’s talk.

    hello@ipstudio.co